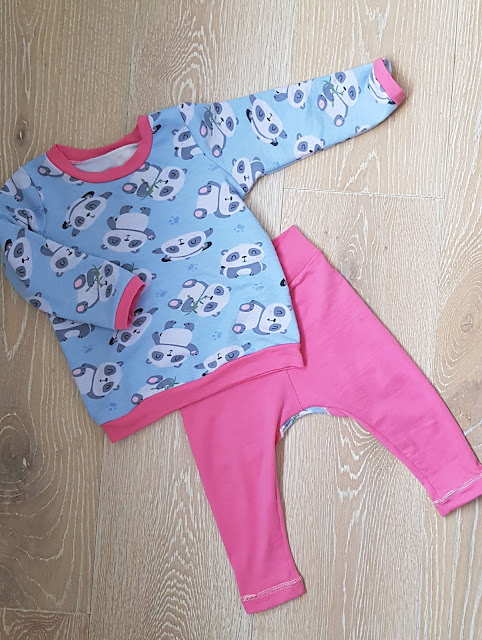
One of my favourite pieces of Freya's ready to wear clothing was a pair of bum panel leggings. From the front, they looked like a cute pair of leggings with sweet polka dots, but as she rolled over, what do you know? There was a ladybug staring right at you. Naturally, once she has outgrown them, I wanted to make my own for the next size.
One of the details on those ladybug leggings were that the bum panel was flatlocked, so I thought I'd go the whole way and recreate those, too. Since this took a bit of experimentation, and there's not that much out there on this topic, I wanted to do a little tutorial here, too. As a result, this post is going to be a long one, with lots of photos, so please make sure you are sitting comfortably.
Outfit
First of all, a few words on the project. I bought this lovely Panda French Terry even before Freya was born, as pandas are obligatory for a half Chinese baby, right?
I knew I wanted to make a long sleeve Ringer Tee with it, but wanted to complete the outfit without there being pandas everywhere. Then the light bulb moment came - bum panel leggings!
I almost self-drafted the bum panel from the tried and tested leggings pattern, but then I came across the Locksley leggings by Mother Grimm. Having spent 4 years living in Cardiff, I have developed quite a soft spot for the Welsh people, who welcomed me wholeheartedly to their country when I was still a fresh faced teenager. I couldn't pass the chance to support an independent (tick), Welsh (tick), sewing-related (tick) business.
Both the top and leggings were made straight out of the envelope, so to speak, in size 9-12 months. Both patterns were great, and an easy sew. The only tricky thing was the flatlocking, which I'll get to now!
TutorialWhat is flatlock?
Strictly speaking, you need a special, industrial machine to do a proper flatlock. It is a stretch seam with basically no bulk, which is why it's often used in activewear.
What I'm showing you today is a flatlock stitch done on an overlocker (or a serger, for those sewing friends across the pond). As I'm doing a "strong flatlock" (or "lapped flatlock"), it is not completely bulk-free, but as the seam allowance overlaps within the stitching, this seam is much more comfortable against the skin compared to a normal overlock. [*NB - you can achieve a complete bulk-free flatlock on an overlocker, but the resulting seam is much less strong and secure, so I don't like to use it on leggings. See the hemming section below).]
What you'll need
- An overlocker/serger
- Its manual
- Matching/contrasting thread
Machine settings
Please refer to your machine manual here. What we are doing is a wide, 3-thread flatlock with the left needle, which means that the left needle will need to come out. The tensions depend on your specific machine, and the fabric that you are working with, but for your reference mine are 0.5, n/a, 5 and 7. These are what my machine recommended for medium-weight fabrics, and worked a treat. I also leave my cutting blade engaged.
Preparation
Before we start flatlocking away, I like to prepare the pattern pieces. The actual sewing part is quick and fun, so let's be patient with the preparation part :)
A key consideration here are the seam allowances, and this comes in two parts.
- For the seams that you are flatlocking, the seam allowances will end up overlapping. My flatlocked seam is approx 5mm (the same as my wide overlock), and the pattern calls for a 10mm seam allowance. This means that I need to trim an extra 2.5mm (approx 1/8 inch) off these seams to enable me to sew them up as usual. In other words, I am trimming off the 2.5mm now from these seams on my cut pattern pieces before sewing, so that when I serge, I'm able to place the fabric in the "normal" position against the blade, trimming off the "normal" amount. Alternatively, you could do nothing now, and trim and extra 2.5mm as you sew, but this tutorial follows the method above.
- Secondly, for the seams that will cross the flatlocked seams, I trimmed the full extra 5mm off the seam allowances before sewing. This is because the flatlocked seams, although strong, are harder to secure. I secure them (as detailed below) with a few steps, but if you end up then cutting the tied ends off as you sewed your next seams, you have a risk of the flatlocked stitch unravelling. This step therefore requires you to consider all the seams that cross the flatlocked seams, and for these leggings, they are the inseams and waistline seams, as well as the waistband seams.
Let's get sewing!
It goes without saying that you should try this stitch on 2 layers of scrap fabrics of the same weight first, before working on your actual garment.
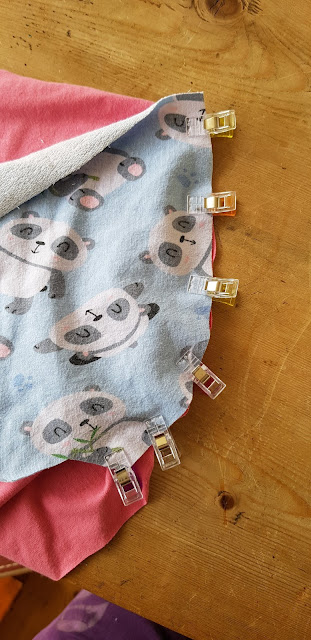
For a traditional flatlocked look, pin or clip the pieces with wrong sides together. I'd like the flatlock to be on the panda (rather than pink) side, so the panda side is facing up. This will make sense in a minute, I promise.
Sew a long thread chain first. Then, place the fabric in the usual position next to the blade (see explanation in the prep section above). Check again that you have the wrong sides together, and start serging as normal. Once the seam is finished, continue sewing until a long thread chain is formed. You should have a seam that looks quite similar to an overlock, but a bit more scrunched up. The tension is a bit off, but this is okay as we want the off tension on purpose.
 Use your fingers to even out the stitching slightly. This is where the long thread chain comes in handy! You'll be amazed by how much of it unravels as you even out the stitch. If you are flatlocking a long seam - leave an extra, extra long tail.
 This is what my seam looks like.
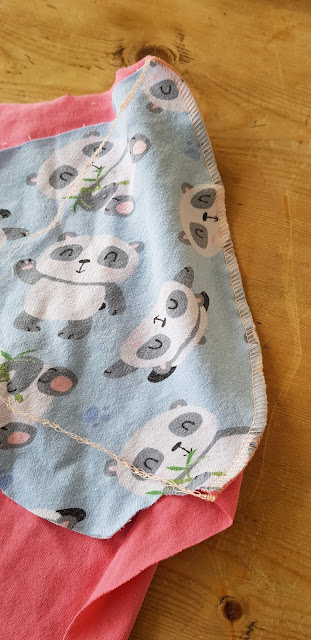
Next, the magic step! Pull your fabrics on both sides so that the stitching loosens up. The seam allowances should overlap each other, and the loopers should appear on the right side of the fabric, enclosing the seam allowances on the panda (or your equivalent) side. Note - you must complete this step before sewing your next seams.
So we have on the right side:
And wrong side. Note that if you prefer the ladders look, and want this on your right side, this is easy to achieve. Instead of pinning and serging wrong sides together, pin and sew with right sides together.
You have a flatlocked seam! Now we just need to secure it. I go a bit crazy here, so I tie a knot (top tip - use a pin to position the knot close to the fabric - pictured below), fray check, and I also bar tack it within the seam allowance. And since I've already trim the other pattern pieces that will be intersecting the ends of the flatlocked seams, I know that I won't be trimming the secured ends off. This should make sure that your beautiful seams stay that way.
That's it! Easy, right?
Bonus points!
Want more? Sure! Some extra points for you.
1) Don't have an overlocker? You can fake this with a sewing machine - see Taisia's tutorial here!
2) This stitch could be used as a decorative detail, too. For example, it looks great on a raglan tshirt.
3) It can also be a nice stitch used for mending ready to wear clothing
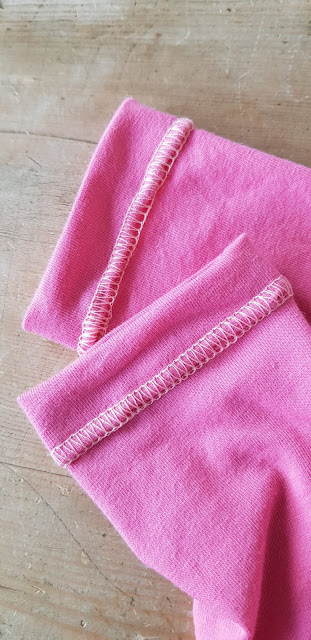
4) You could have a matching flatlocked hem, too!
What I've outlined above is where we have the seam allowances overlapping each other (what I'm calling a "strong flatlock"), rather than having them next to each other and meeting in the middle (more of a true flatlock). For 2), 3) and 4) above, we need to aim for less bulk, and therefore the true flatlock.
Let me demonstrate it on the hem. With hindsight, I'd actually recommend that you hem with a flatlock flat, rather than in the round. In other words, it would be better to sew the hem before the inseams. You could then start and finish in the seam allowance, so that the thread chains/ends will be nicely hidden in the inseams.
First, fold your hem once to the wrong side as usual. You'll want to fold the full depth of the hem required for your pattern.
Then fold again to the wrong side, by exactly the same amount. To achieve a neat hem, it's crucial to fold exactly the same amount over in these steps, making sure that the raw edge is right on the second crease/fold. You might find that pressing helps here.
Next, disengage your cutting blade. Position the fabric slightly to the left so that the left needle catches the fabric, but the loops are hanging off the fabric. Before you sew on the fabric, remember to leave a long thread chain again at the start and end.
See what I mean? Some of the stitching are on the fabric, and some off.
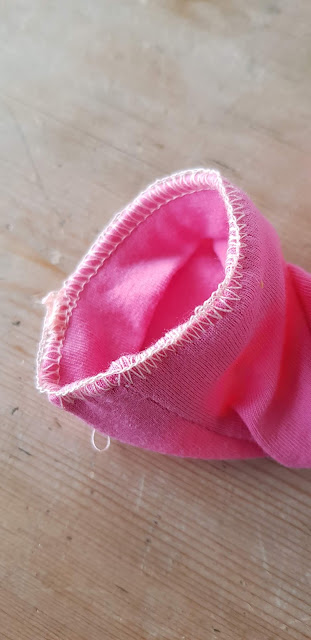
Now unfold the second fold, and pull flat. You should have on the outside:
And inside:
Isn't it neat? Again, if you prefer the ladders, fold the opposite way - fold hem to the outside, and then again, before sewing as above. Now secure your thread chains, and you are done!


