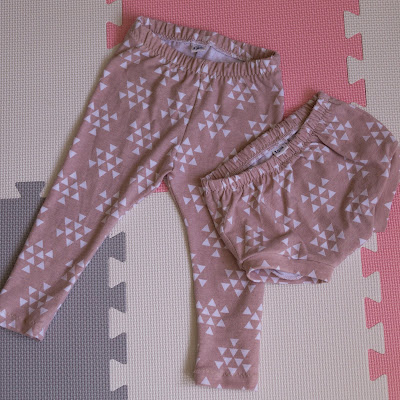
As Freya starts to grow out of her 6-9 clothes, I've been working on some wardrobe essentials for her in 9-12.
I made another pair of the trusted leggings by Brindille & Twig, and unlike last time, without drama.
I also tried out their Bummies pattern, which is available for free! I opted for the leg bands, and omitted the drawstring. They have been great for the recent warm days, mainly as a neutral-coloured nappy cover under a little sundress.
The fabric was a combed cotton jersey that I picked up on Black Friday last year from Girl Charlie.
Both are such easy sews, and let me warn you now that I'll no doubt be making more versions of these in the years to come.
One thing I have not had to worry about before now was size labels. Apart from when I was sporting a huge bump, my size has been pretty constant. But churning out clothes for a rapidly growing baby is a whole new ball game entirely. Suddenly, we needed to know the size of every item, especially when I'm not the only person that dresses our daughter.
After gathering some bits from my stash, I made a few DIY size labels. I wanted them to be clear, rustic looking, and comfortable against the super soft baby skin. I liked how they turned out, so wanted to share with you what I did in case it helps anyone.
What I used:
- 3/4 inch (19mm) wide white cotton twill tape
- Stamp set with numbers and letters (each stamp here is sized 12x9mm)
- Inkpad - I used a Versacraft one which is good for fabric
- An iron
The rest is pretty simple. I cut a 6cm+ long strip of twill tape. Leaving around 1.5cm blank from the top, I did the 3 stamps snugly (and the width of the twill tape was perfect). Once dry, I ironed the strip over a pressing cloth (a bit of silk organza) for 20 seconds, on a cotton setting without steam (some say 2-5 minutes, but even with the iron moving, my tape and the ironing board cover got scorched after less than a minute). Once cool, fold your strip in half, and you should have 1.5cm of seam allowance above the stamp. You can trim down the seam allowance if necessary. Sew into the seam as desired.
For these bummies and leggings, I sewed the label onto the centre back when topstitching the folded serged waistband elastic, with my normal 3-step zigzag. I've actually batch made a few labels, including for the next size. If you wanted to do this, just remember to give the stamps a quick wipe after each stamp, so that you don't get too many ink "boxes" around the letter/number.
Of course, you can get creative with this, playing with the size of tape, stamps, angles etc. I have a few funky stamps in my stash from the wedding planning/thank you card days, and may well experiment with a few designs next!


